
All help topics
Help topics
- Getting Started
- Sales & POS
- Products & Inventory
- Purchases & Suppliers
- Customers
- Staff & Permissions
- Reports
- Branches
- Hardware
- Payments
- Settings
- Troubleshooting
- Billing & Subscription
- Workshop
- Training
- Sales Agents
- Laundry
- Accounting
- HR & Payroll
- Hotel
- Services
- Communication Center
- Online Store
- CRM
- Restaurant
- F&B Manager
- Production
- Projects
- Asset Management
- All topics
On this page
How to Use the New POS Screen
Switch on Enable new POS interface (Beta) under Settings → Business Settings → POS. Cashiers then see a Try the new POS button on the POS screen, with a product grid, a cart and one-tap payment buttons. They can go back with Switch to classic POS at any time.
The new POS is a redesigned selling screen: products as tiles you tap, a cart that shows each line clearly, and payment buttons along the bottom. It records exactly the same sales as the classic POS, so your reports, stock and registers are unchanged whichever screen a cashier uses.
Step 1: switch it on
- Open Settings → Business Settings and go to the POS tab.
- Tick Enable new POS interface (Beta) and save.
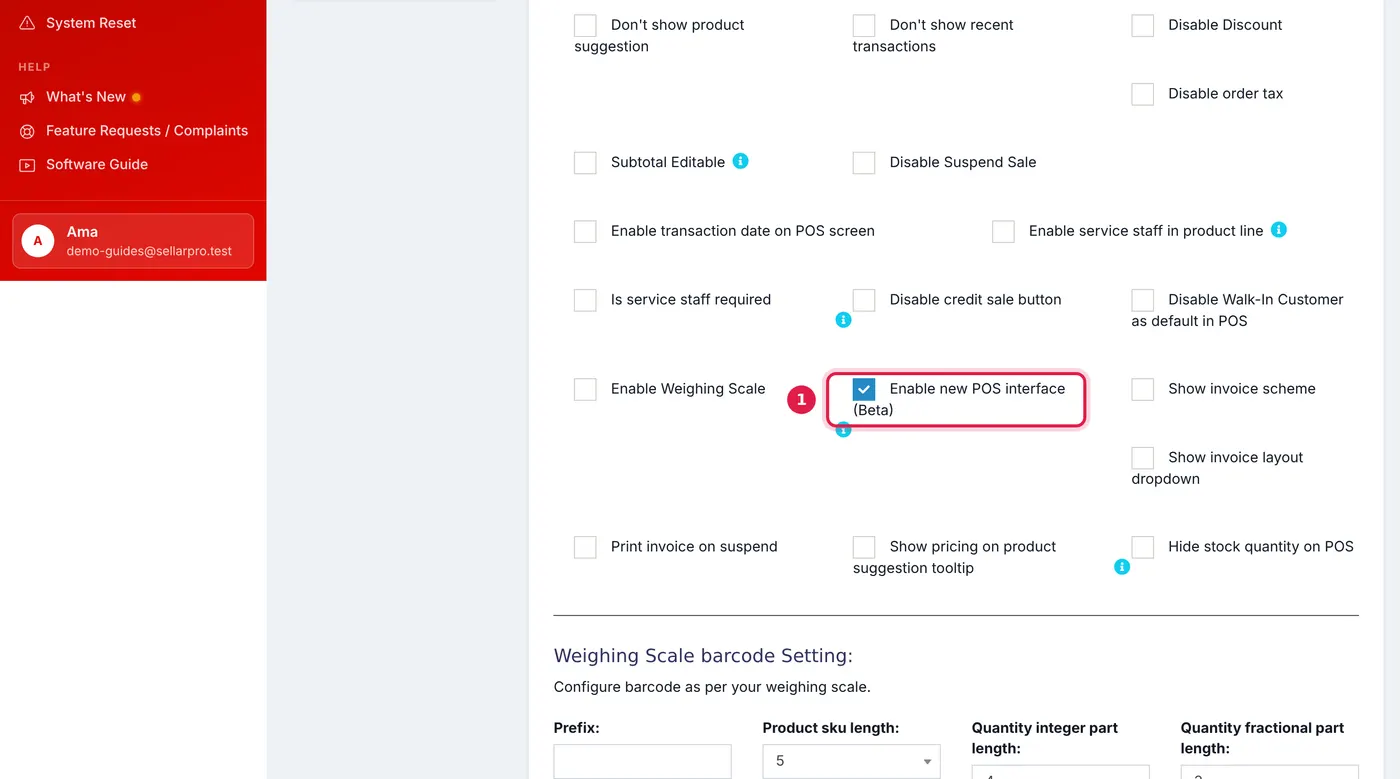
The setting is on the POS tab of Business Settings. - On the POS screen, cashiers now see a Try the new POS button in the top bar.
Step 2: make a sale
- Pick the customer in Enter customer name / phone, or leave the walk-in customer for a cash sale.
- Add items. Tap a product tile, filter by Category or Brands, or scan a barcode into the search box.
- Change the quantity in the cart. Open Line options on a line for the unit, lot and expiry, serial number, or Price, discount & notes.
- Use Add adjustment for a Discount, Order Tax, Shipping, Service Fee, Packing Charge or Round Off on the whole sale.
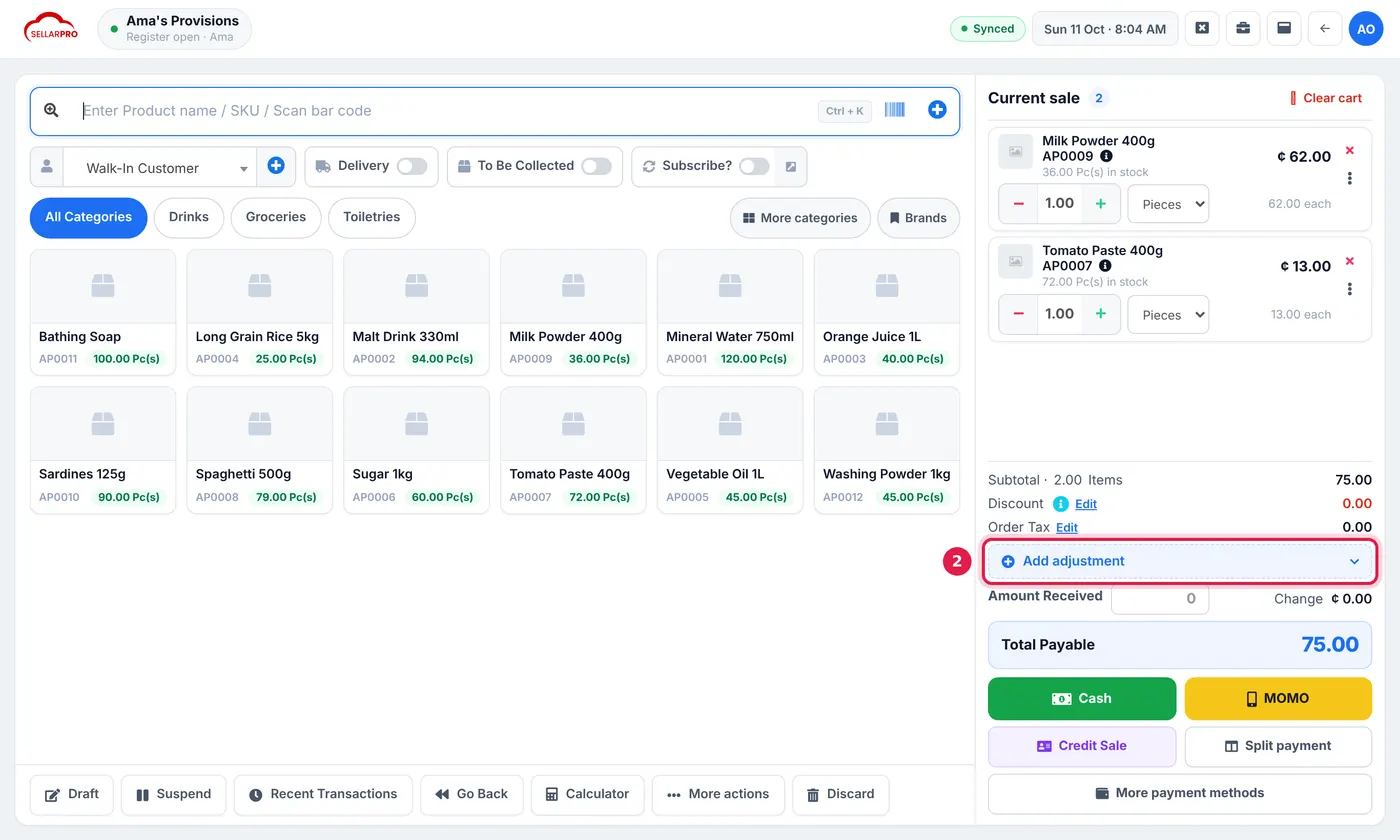
Tap products on the left; the cart, adjustments and payment buttons are on the right. - Pay with a one-tap button such as Cash, or choose Split payment to take more than one method, or Credit Sale to put it on the customer's account.
Going back
Click Switch to classic POS at any time. Nothing is lost: both screens save to the same sales list.
Draft, Suspend and Recent Transactions sit in the bar at the bottom, with More actions for the rest.
Common questions
Do I have to use the new POS?
Will my reports change?
Was this article helpful?
Thanks — your answer helps us improve this article.
Still need help?
Can’t find the answer you’re looking for? Our support team in Accra can help.