
All help topics
Help topics
- Getting Started
- Sales & POS
- Products & Inventory
- Purchases & Suppliers
- Customers
- Staff & Permissions
- Reports
- Branches
- Hardware
- Payments
- Settings
- Troubleshooting
- Billing & Subscription
- Workshop
- Training
- Sales Agents
- Laundry
- Accounting
- HR & Payroll
- Hotel
- Services
- Communication Center
- Online Store
- CRM
- Restaurant
- F&B Manager
- Production
- Projects
- Asset Management
- All topics
On this page
How to Set Up Roles and Permissions
Open Access Controls → Roles and click Add. Name the role after the job, tick exactly the permissions it needs, and save. Give the role to staff under Access Controls → Users, where you also choose which branches each person can use.
A role is a set of permissions for a job: Cashier, Storekeeper, Supervisor. Give each person a role, and they see only what that job needs.
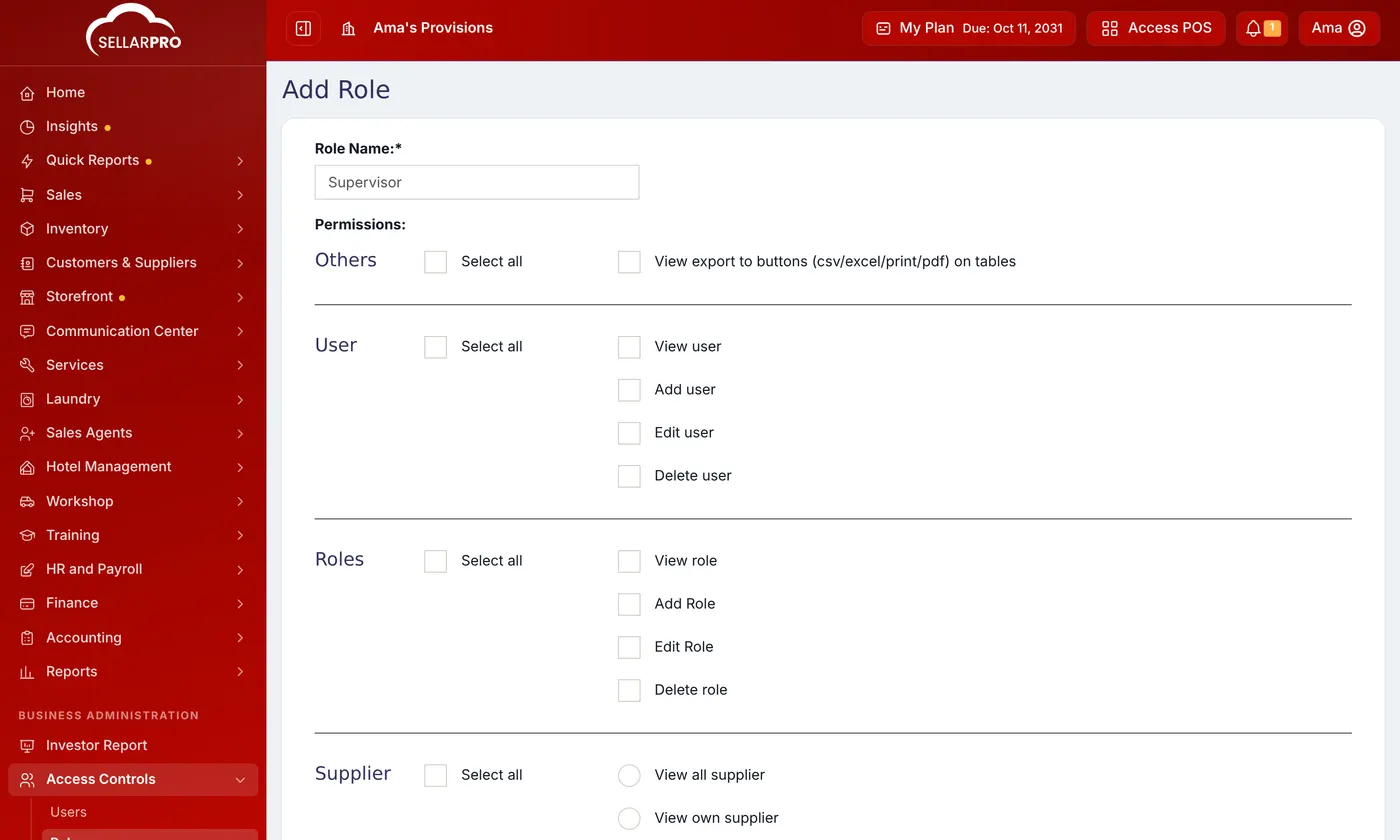
Create a role
- Open Access Controls → Roles and click Add.
- Type the Role Name, for example "Supervisor".
- Under Permissions, tick what the role may do. They are grouped by area: users, suppliers, customers, products, purchases, stock, sales, POS, cash register, reports, settings and each module. Use Select all on a group to tick all of it.
- Save.
Give it to someone
Open Access Controls → Users, edit the person and choose the Role. Branches are set on the user, not the role: under Access locations, tick the branches they work at or All Locations.
Permissions worth knowing
- View all sell or View own sell only: whether staff see everyone's sales or only theirs.
- View Purchase Price: leave it off to keep your costs and margins private.
- View cash register: leave it off and keep Close cash register on for a blind count. See How to Close a Cash Register with a Blind Count.
- Disable Discount and Disable credit sale button under POS: take those buttons away from this role.
A change to a role applies the next time the person signs in. Ask them to sign out and in again.
Common questions
What is the Admin role?
A permission box is missing.
Was this article helpful?
Thanks — your answer helps us improve this article.
Still need help?
Can’t find the answer you’re looking for? Our support team in Accra can help.