
All help topics
Help topics
- Getting Started
- Sales & POS
- Products & Inventory
- Purchases & Suppliers
- Customers
- Staff & Permissions
- Reports
- Branches
- Hardware
- Payments
- Settings
- Troubleshooting
- Billing & Subscription
- Workshop
- Training
- Sales Agents
- Laundry
- Accounting
- HR & Payroll
- Hotel
- Services
- Communication Center
- Online Store
- CRM
- Restaurant
- F&B Manager
- Production
- Projects
- Asset Management
- All topics
On this page
How to Choose Your POS Settings
Short answer
Open Settings → Business Settings and choose the POS tab. Tick the options that change how the selling screen works: hiding buttons such as Discount, Draft or Credit Sale, the new POS screen, the weighing scale, hiding stock quantities and more. Click Update Settings.
The POS works out of the box. These settings fit it to how your counter works. They apply to every till in the business.
Steps
- Open Settings → Business Settings and choose the POS tab.
- Tick or untick the options you need.
- Click Update Settings.
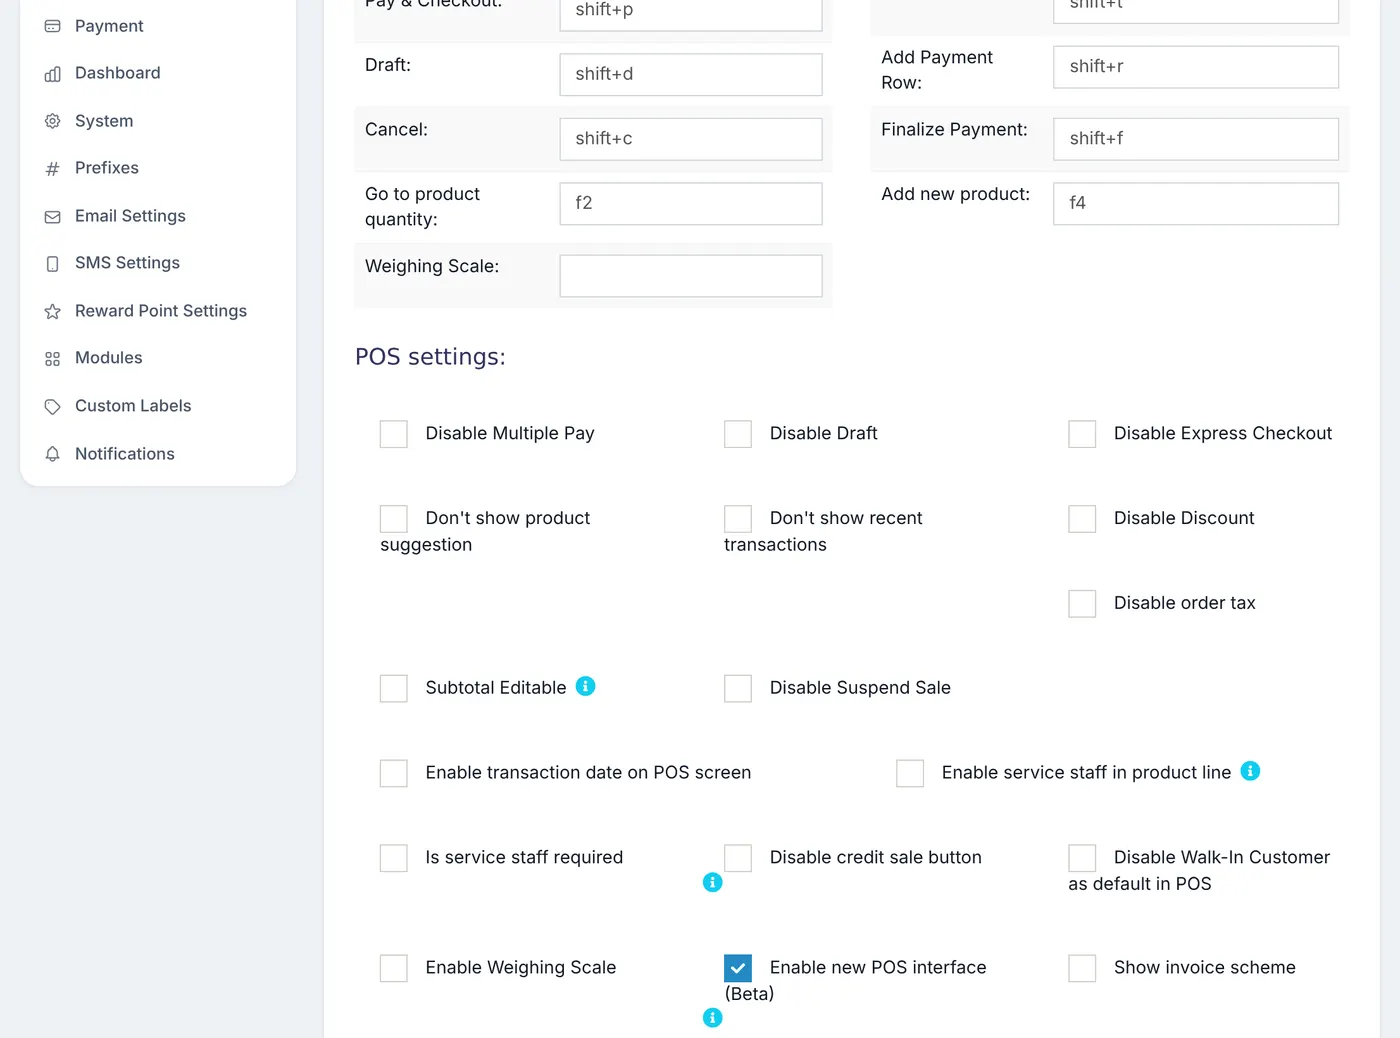
The settings most shops change
- Disable Discount, Disable Draft, Disable Suspend Sale, Disable Express Checkout, Disable Multiple Pay and Disable credit sale button remove those buttons from the POS.
- Enable new POS interface (Beta) switches to the newer POS screen. See How to Use the New POS Screen.
- Hide stock quantity on POS: see How to Hide Stock Quantities on the POS.
- Enable transaction date on POS screen lets cashiers change the sale date, for entering yesterday's sales.
- Disable Walk-In Customer as default in POS makes the cashier choose a customer for every sale.
- Enable Weighing Scale reads weight barcodes from a scale; set the barcode format under Weighing Scale barcode Setting.
- Print invoice on suspend prints a slip when a sale is put on hold.
To control one cashier rather than everyone, use their role instead. Under Access Controls → Roles, the POS section has the same kinds of switches per role.
Common questions
I changed a setting but the till looks the same.
Reload the POS page. It reads the settings when it opens.
Was this article helpful?
Thanks — your answer helps us improve this article.
Still need help?
Can’t find the answer you’re looking for? Our support team in Accra can help.