
All help topics
Help topics
- Getting Started
- Sales & POS
- Products & Inventory
- Purchases & Suppliers
- Customers
- Staff & Permissions
- Reports
- Branches
- Hardware
- Payments
- Settings
- Troubleshooting
- Billing & Subscription
- Workshop
- Training
- Sales Agents
- Laundry
- Accounting
- HR & Payroll
- Hotel
- Services
- Communication Center
- Online Store
- CRM
- Restaurant
- F&B Manager
- Production
- Projects
- Asset Management
- All topics
On this page
How to Set Up a Second Branch
Open Settings → Business Locations and click Add. Name the branch and save. Then make your products available there with Add to location, move or import its stock, and give staff access under Access locations on their user account.
Each branch in SellarPro is a business location with its own stock, cash registers, staff access and reports, all under one account.
Step 1: add the location
- Open Settings → Business Locations and click Add.
- Enter the Name, address and Mobile. These print on that branch's receipts.
- Choose the Invoice scheme for POS and Invoice layout for POS if the branch needs its own numbering or receipt design.
- Under Payment Options, choose the payment methods the branch accepts and the Default Account for each.
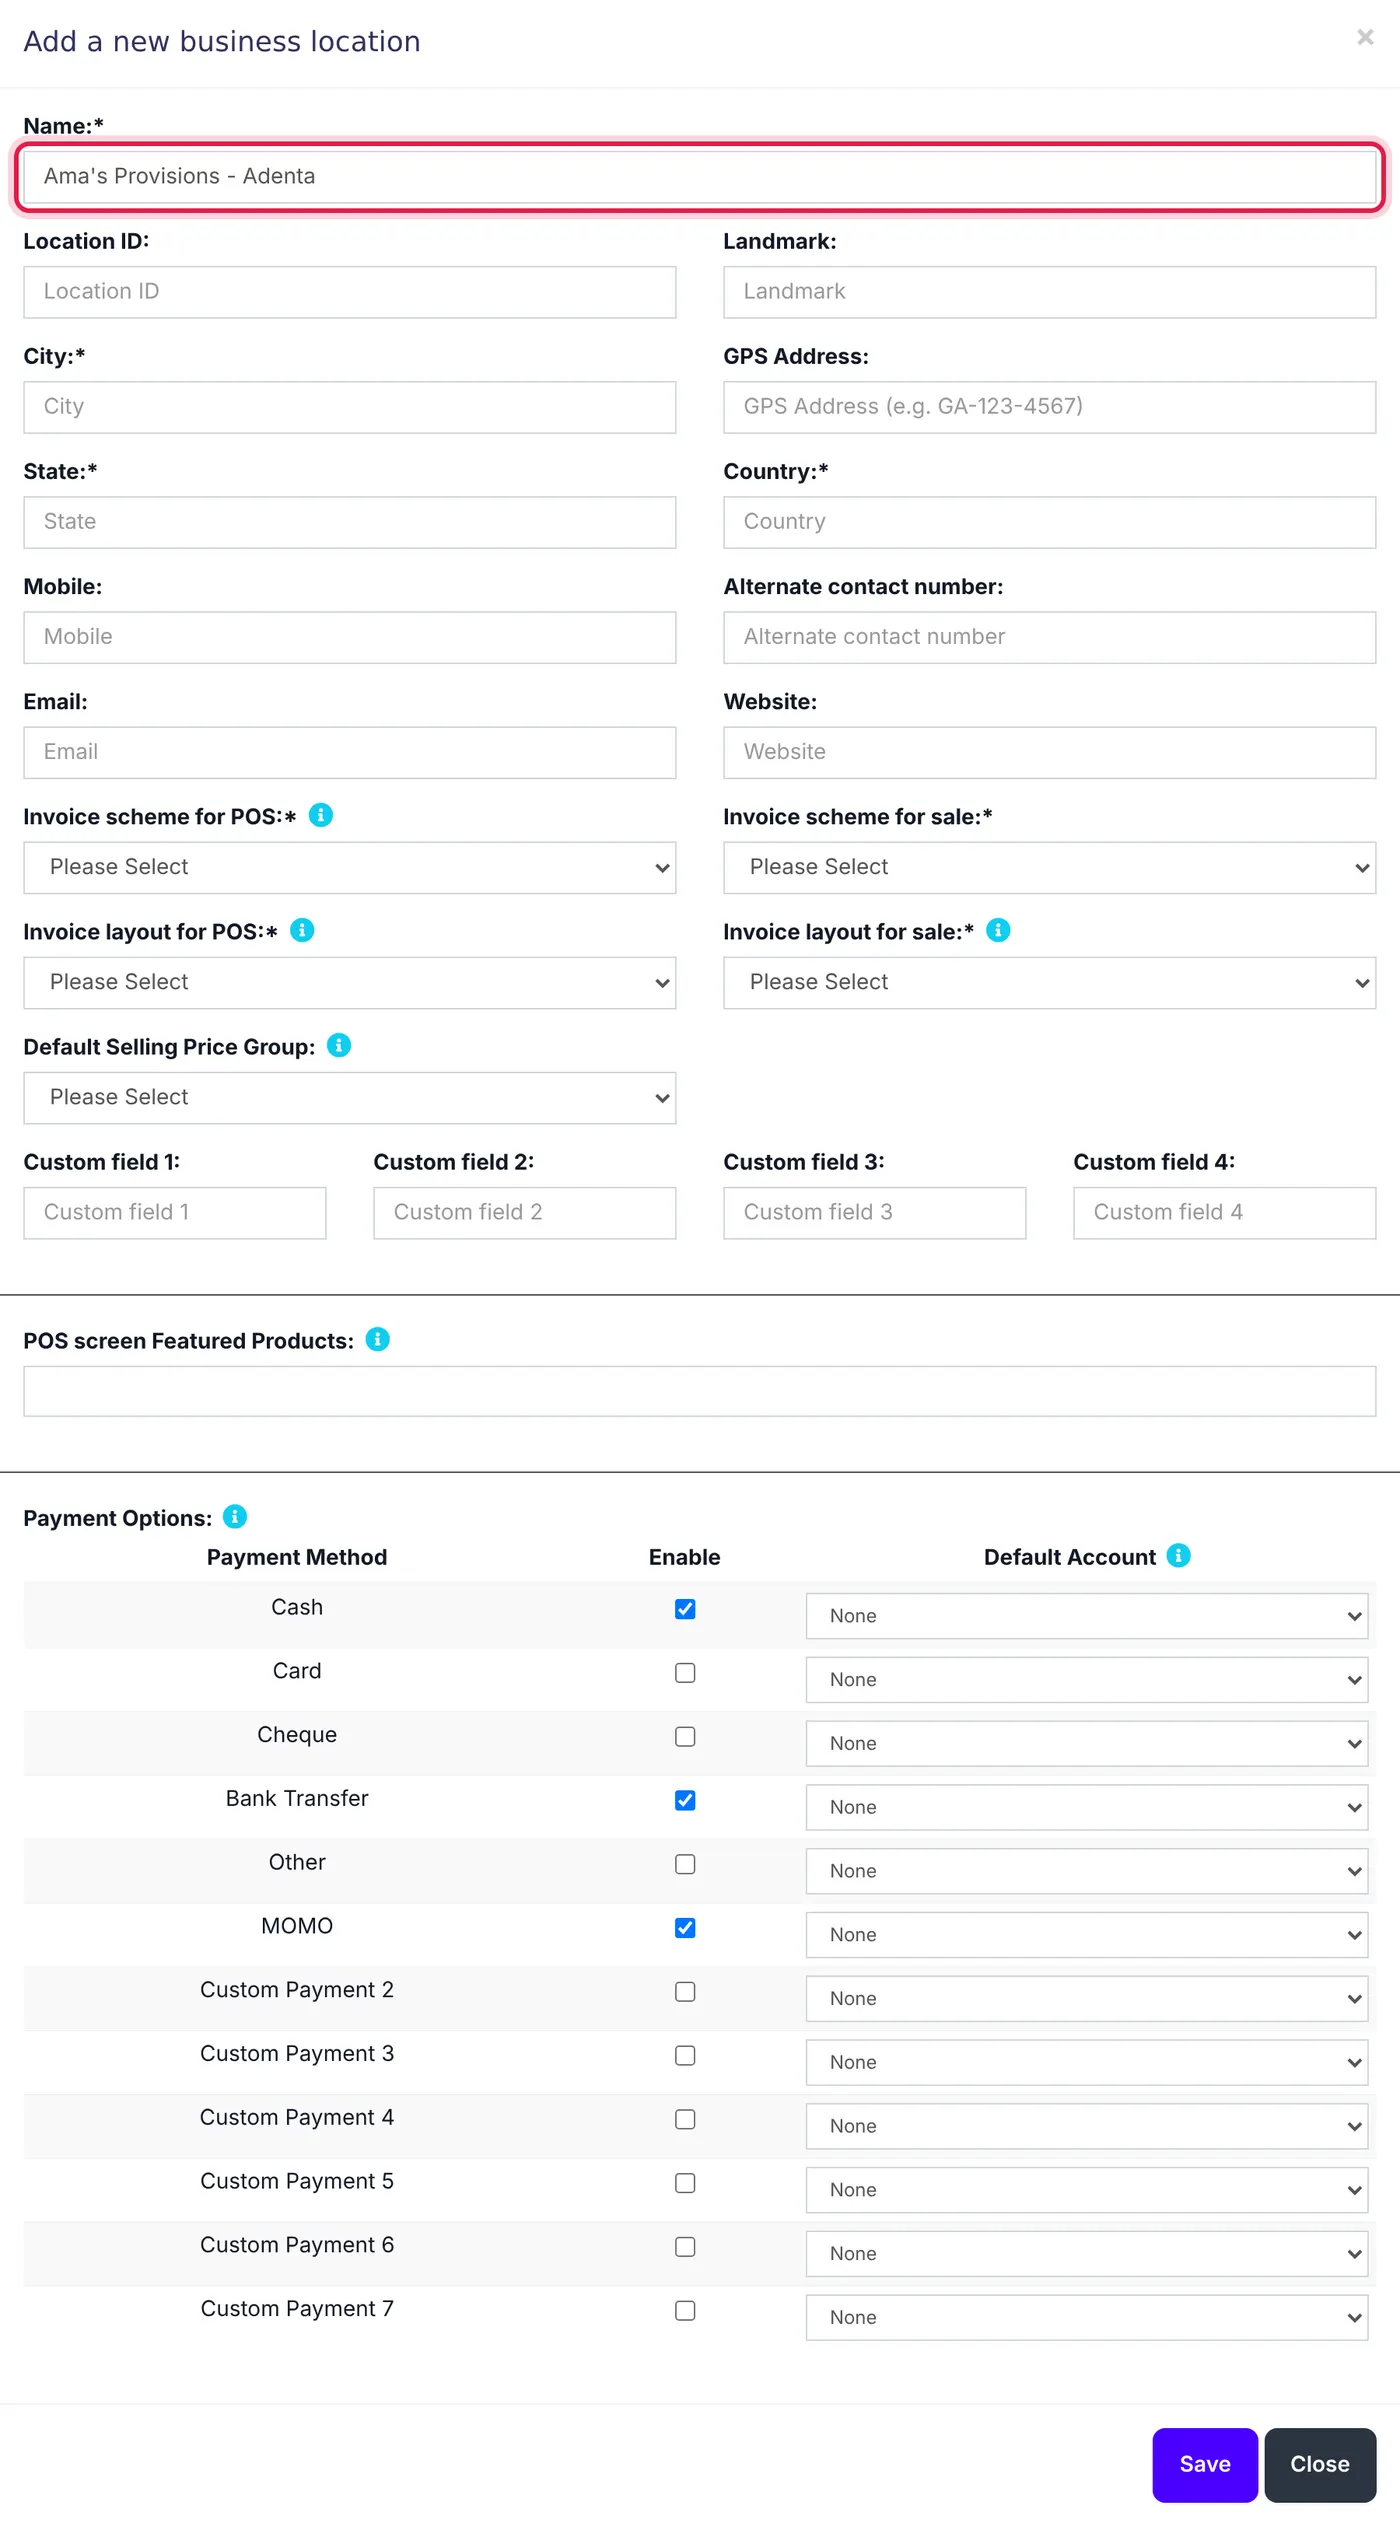
The whole form, down to which payment methods the branch takes. - Click Save.
If SellarPro says you have reached your limit, your plan allows fewer locations. Upgrade in Package Subscription.
Step 2: make your products available there
In Inventory → Products, tick the products, open the bulk actions and choose Add to location. New products are offered at the locations ticked in their Business Locations field.
Step 3: give the branch its stock
- Moving stock from your first shop: see How to Transfer Stock Between Branches.
- Starting with stock already on its shelves: see How to Import Each Branch's Opening Stock.
Step 4: give staff access
Open Access Controls → Users and edit each staff member. Under Access locations, tick the branches they work at, or All Locations for managers. Staff only see the sales, stock and registers of their own branches.
Common questions
Can I see both branches together?
Do the branches share customers?
Was this article helpful?
Thanks — your answer helps us improve this article.
Still need help?
Can’t find the answer you’re looking for? Our support team in Accra can help.