
All help topics
Help topics
- Getting Started
- Sales & POS
- Products & Inventory
- Purchases & Suppliers
- Customers
- Staff & Permissions
- Reports
- Branches
- Hardware
- Payments
- Settings
- Troubleshooting
- Billing & Subscription
- Workshop
- Training
- Sales Agents
- Laundry
- Accounting
- HR & Payroll
- Hotel
- Services
- Communication Center
- Online Store
- CRM
- Restaurant
- F&B Manager
- Production
- Projects
- Asset Management
- All topics
On this page
How to Run a Repair Job in Workshop, from Check-In to Release
In Workshop, open a job card when the vehicle arrives, build an estimate of parts and labour, and get the customer's approval by link or record it yourself. Assign a technician, move the job across the Job Board, then generate the invoice and release the vehicle.
Workshop is SellarPro's module for auto repair garages. It follows a car from the moment it drives in to the moment it is collected.
Before you start
- Workshop is part of selected plans. If you do not see Workshop in your menu, contact us and we will switch it on.
- Add your mechanics in Workshop → Technicians with Add technician: name, phone and an optional speciality such as Engine or Electrical. A mechanic does not need a SellarPro login.
- Customer text messages are off until you turn them on in Workshop → Settings.
1. Check the vehicle in
- Open Workshop → Job Cards and click Check In Vehicle.
- Choose or add the customer and the vehicle.
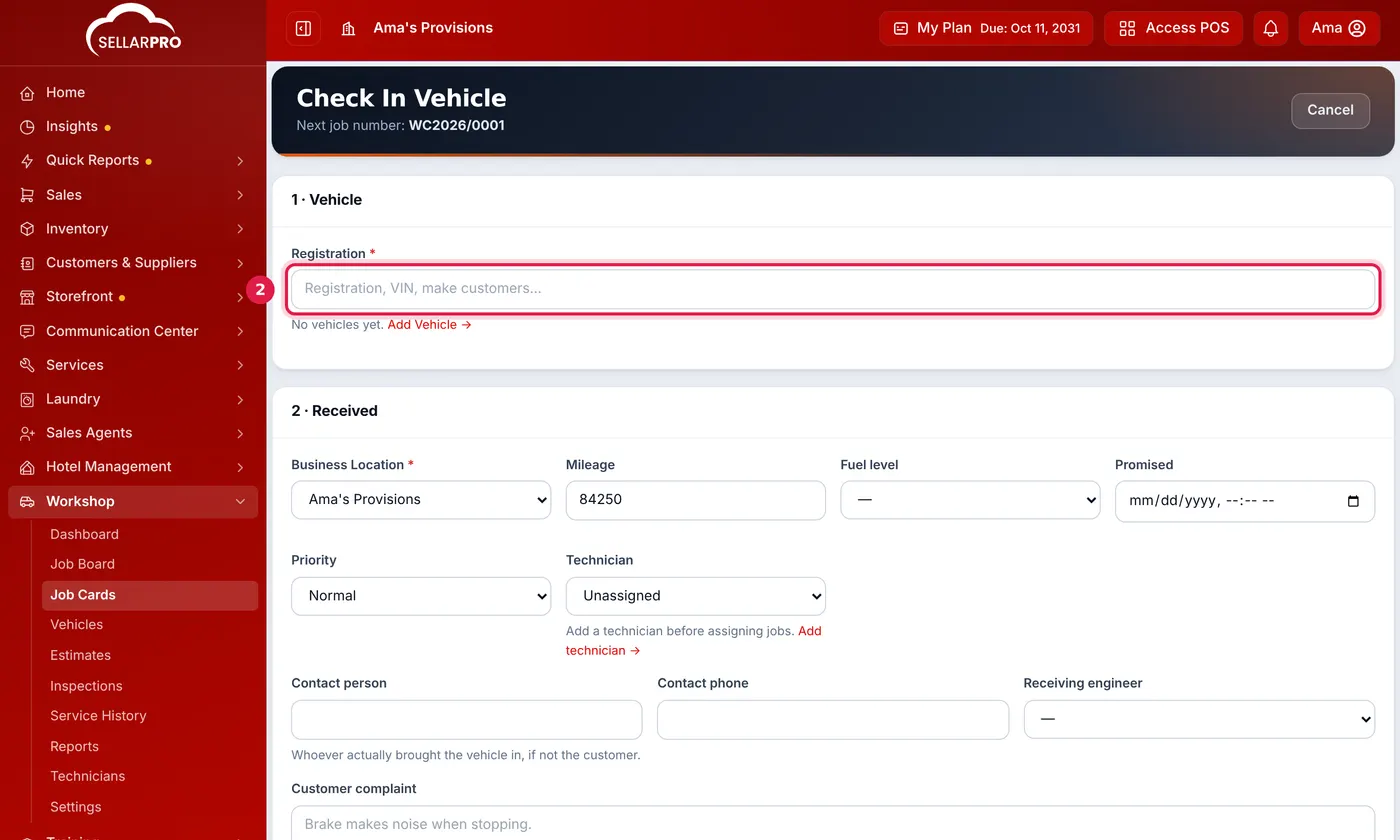
Search for the vehicle by registration, then record how it came in. - Record the mileage, fuel level, the customer's complaint, the vehicle's condition, anything left inside, and who received it.
The job starts as Received.
2. Build the estimate
- On the job card, start an estimate.
- Add Parts and Labour. The parts list shows what is in stock at your branch. Nothing leaves stock yet.
3. Get the customer's approval
Send the customer a link to approve or decline the estimate, or record their answer yourself if they replied by phone, WhatsApp or at the counter. Work found halfway through gets its own additional work estimate and its own approval.
4. Do the work
- Assign a technician.
- Move the job across the Job Board: In Progress, Quality Check, Ready for Collection. A job cannot skip the customer's approval or the quality check.
5. Invoice and release
- Click Generate Invoice. Only approved work is invoiced, and parts come out of stock at this point, once.
- Take payment as you would for any sale.
- Click Release Vehicle and record who collected it. The job is Delivered.
Along the way
- Add photos to the job card: before, during, after and damage.
- Use inspection sheets with OK / Not OK answers, also on their own for a pre-purchase check.
- See every vehicle's Service History, and technician performance under Reports.
Common problems
"Build an estimate before sending the job for approval"
A job can only wait for approval once it has an estimate with at least one line.
The technician list is empty
Add your mechanics in Workshop → Technicians. Only people added there, or staff accounts set up as technicians, can be given a job.
"That person has a SellarPro login"
A technician who also logs in cannot be retired from the Technicians page. Deactivate them under Access Controls → Users instead.
Common questions
Do my mechanics need to log in?
When do parts leave stock?
Can the customer approve from their phone?
Was this article helpful?
Thanks — your answer helps us improve this article.
Still need help?
Can’t find the answer you’re looking for? Our support team in Accra can help.