
All help topics
Help topics
- Getting Started
- Sales & POS
- Products & Inventory
- Purchases & Suppliers
- Customers
- Staff & Permissions
- Reports
- Branches
- Hardware
- Payments
- Settings
- Troubleshooting
- Billing & Subscription
- Workshop
- Training
- Sales Agents
- Laundry
- Accounting
- HR & Payroll
- Hotel
- Services
- Communication Center
- Online Store
- CRM
- Restaurant
- F&B Manager
- Production
- Projects
- Asset Management
- All topics
On this page
How to Take a Student from Application to Certificate
In Training, add your courses to the Catalogue and open an intake. Accept an application, place the student and raise their invoice in one step. Take attendance and marks as classes run, then mark the class completed on the intake's Graduation tab and issue certificates.
Training is SellarPro's module for training institutes, academies and vocational schools. It runs the whole journey from a student's application to their certificate, and fees go through your normal sales and accounts.
Before you start
Training is part of selected plans. If you do not see Training in your menu, contact us. Once it is on, Training → How it works shows each step and how far your institution has got.
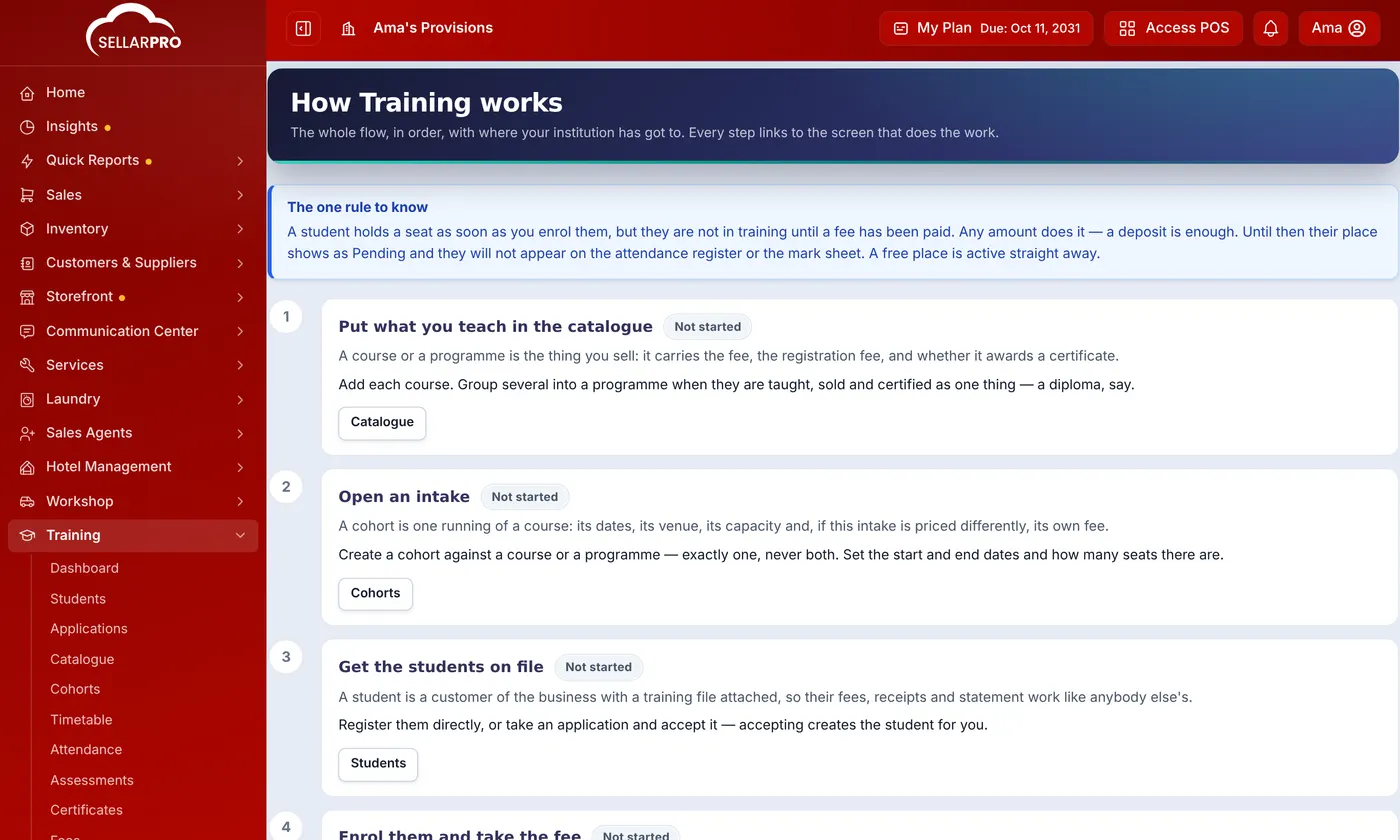
1. Put what you teach in the catalogue
In Training → Catalogue, add each course with its fee, any registration fee, and whether it awards a certificate. Group courses into a programme, such as a diploma, when they are taught and certified as one.
2. Open an intake
In Training → Cohorts, create an intake for a course or a programme with its dates, venue, number of seats and lead instructor. Add more instructors on the intake's Instructors tab.
Save the intake's Weekly pattern and the classes are created for you.
3. Get students on file
Any of these works:
- Register a student directly.
- Review an application under Applications and Accept it. Accepting creates the student for you.
- Share your online application form: switch on Accept applications online in Training's settings and share the link on WhatsApp, Facebook or your website. It is off until you switch it on.
- Import a spreadsheet of past or current students. They are matched by phone number.
4. Enrol them and take the fee
When you accept an application, leave Place them in an intake now ticked. That enrols the student in the intake they applied for and raises their invoice in the same click. For anyone else, press Enrol on the student's page.
The one rule to know: enrolling holds a seat, but a student is not in training until a fee has been paid. Any amount, even a deposit, is enough. Until then their place shows as Pending and they do not appear on the register or the mark sheet. A free place is active straight away.
The student's page shows each enrolment's fee, invoice, payments and balance, with buttons to Raise invoice, Record payment, mark completed and issue the certificate.
5. Teach: attendance and marks
Instructors take the register from My classes on their phone. Set assessments and enter marks as they are graded.
6. Certify
- Open the intake's Graduation tab.
- Tick the students, mark them completed, then issue their certificates.
- Download all the certificates as one PDF to print.
Each certificate carries a QR code that an employer can scan to confirm it is genuine. A student who has not met a requirement, such as attendance, the pass mark or fees, is only certified if you give a reason, and that reason is recorded on their certificate.
Needs action on the Training dashboard lists everything waiting on you: applications to decide, accepted students not yet placed, places with no invoice, and ended intakes to graduate.
Common questions
Where do training fees show up in my accounts?
Can a company pay for a student?
Can I send students text messages?
Was this article helpful?
Thanks — your answer helps us improve this article.
Still need help?
Can’t find the answer you’re looking for? Our support team in Accra can help.